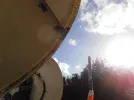
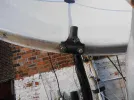
Restoring a working antique dish to full functionality..

Bugger !

Forgot about the wine tax when I posted out
Paid my wine tax to Scopus Stephen....and am happy to pay it you also.
Just let me know what you want and where to send it.
:D
 
Get the reflector straightened first, then you can try both feeds side by side (well not side by side but you know what I mean)
 
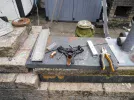
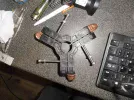
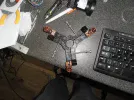
The plastic adjustable spider arrived yesterday evening...so after some contemplation I formulated a plan of attack..
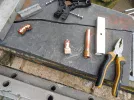
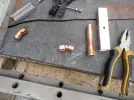
45 degree copper elbows...cut and shaped ...sadly only got one made before it clouded over and started to rain.
Still only take about 30 minutes each but at least I have a way forward now.
Time for tea and toast..
maybe I'll get to try again this afternoon.
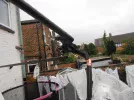
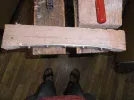
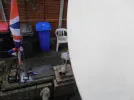
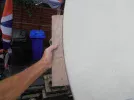
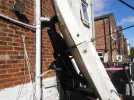
The story so far in pictures..
 

Attachments

  • P1010014.webp
    P1010014.webp
    834.4 KB · Views: 15
  • P1010015.webp
    P1010015.webp
    706.4 KB · Views: 15
  • P1010016.webp
    P1010016.webp
    550.4 KB · Views: 16
  • P1010017.webp
    P1010017.webp
    430.5 KB · Views: 17
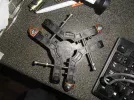
Perhaps not quite as good a fit as the first one..though a bit of tweaking will fix em..
Got a bit sick of bringing all my tools indoors every 15 minutes....but here is the result.
still have the m6 holes to drill in the copper....but that can wait.
Time to get the kettle on..
lol
 

Attachments

  • P1010018.webp
    P1010018.webp
    1.5 MB · Views: 68
  • P1010019.webp
    P1010019.webp
    1,009.1 KB · Views: 40
Last edited:
Just enough time between showers to drill the M6 holes in the copper..
thats all she wrote for today..
cest la vie
 

Attachments

  • P1010020.webp
    P1010020.webp
    1.4 MB · Views: 31
She will have to wait CH ....for decent weather to coincide with my mate having time to help me.
In the meantime I'll get done the jobs I can do whilst dodging in and out between showers.
doh !
Had a fair bit of wind today here....so no slackening of bolts whilst those westerlies persist.
 
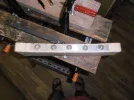
Today I figured I'd tackle the missing edge brackets for the dish..
Drilled the m8 holes before anything else ..then marked and rough cut a piece of timber with a jigsaw to follow the curve of the dish rim.
pilot drilled five holes to align with the M8 holes into the wooden curve....then using stock 3mm aluminium screwed it to the curved surface..
I dont know at this point how much return spring I will get when I release the wood screws...so my question to anyone familiar with aluminium..
Anneal or not to Anneal that is the question ?
Cold bending will most likely retain strength and if anything work harden the ally bar....whereas annealing will make it soft and more pliable thus less brittle.
I could just tap and gently work harden the bar whilst screwed down ?
All advice is most welcome..
rgds
 

Attachments

  • P1010021.webp
    P1010021.webp
    660.1 KB · Views: 27
  • P1010022.webp
    P1010022.webp
    762 KB · Views: 33
Last edited:
I don't think aluminium can be easily annealed outdoors and up a ladder, you need it to be at least 370 degrees before it changes maleability, by then the paint will have gone and your blowtorch empty.

You could fabricate multiple brackets to keep the reflector in shape after shakedown and stringing
 
I wouldn't be annealing on the dish CH ..the brackets would be made indoors and presented to the dish when curved since they simply bolt on..
 
For a 1.8 m radius I would just bolt them from the panel joins and work upwards, they should bend without trouble but don't forget there will be a three dimensional angle to align with. Best make multiple bolt holes in a similar curvature.
 
For a 1.8 m radius I would just bolt them from the panel joins and work upwards, they should bend without trouble but don't forget there will be a three dimensional angle to align with. Best make multiple bolt holes in a similar curvature.
All those things will be taken into consideration Stephen.
What I know so far is this.
Screwing down to the wooden former produced no curve deformation when released...still a flat bar it just sprung back as expected.
Did some more tweaking to the former and offered it up to the dish edge.
Pretty damned close at this point
Maybe a bit more rasping needed.
Question ?
Would a domestic oven get hot enough ..
My thinking is the heat would dissipate over the aluminium more evenly than a blow torch.
I am considering throwing the whole thing ...bar and former in there then allowing it to cool in ambient air (no quenching)...
Thoughts on this would be appreciated.
 

Attachments

  • P1010023.webp
    P1010023.webp
    223.9 KB · Views: 19
  • P1010024.webp
    P1010024.webp
    217 KB · Views: 27
Last edited:
All those things will be taken into consideration Stephen.
What I know so far is this.
Screwing down to the wooden former produced no curve deformation when released...still a flat bar it just sprung back as expected.
Did some more tweaking to the former and offered it up to the dish edge.
Pretty damned close at this point
Maybe a bit more rasping needed.
Question ?
Would a domestic oven get hot enough ..
My thinking is the heat would dissipate over the aluminium more evenly than a blow torch.
I am considering throwing the whole thing ...bar and former in there then allowing it to cool in ambient air (no quenching)...
Thoughts on this would be appreciated.
apparently the oven is a no go....according to google.
so blow torch it is...

Ok the ally strip was annealed using the Sharpie/Blowtorch method ..now screwed hard down to the pine former....and it's coffee time here.
just gotta keep the job out of reach of my inquisitive cat whilst it cools fully.
results later.
 
Last edited:
apparently the oven is a no go....according to google.
so blow torch it is...

Ok the ally strip was annealed using the Sharpie/Blowtorch method ..now screwed hard down to the pine former....and it's coffee time here.
just gotta keep the job out of reach of my inquisitive cat whilst it cools fully.
results later.
What is the strip minimum dimension (bendy bit ?)

Also you have five drilled holes, not six (three for each panel)

Perhaps I am missing something, is this/these are to go around the edge ?
 
The short curved plate has originally 2 holes roughly 11mm apart...and fit much like the wooden former offered up to the dish edge.
There are 2 curved plates on this strip which are yet to be cut off.
It seemed prudent to make both plates in one go before seperating them.....but the strip isn't long enough for the 3rd edge bracket and so I will have to repeat the process for bracket 3.
The middle hole isn't relevant beyond forming.
hope that makes sense CH
I have left the brackets long enough for extra holes to be drilled in situe if needed for extra rigidity.

These photos should make it clearer.
rgds
 

Attachments

  • P1010025.webp
    P1010025.webp
    489.2 KB · Views: 20
  • P1010026.webp
    P1010026.webp
    244.7 KB · Views: 22
Last edited:
The short curved plate has originally 2 holes roughly 11mm apart...and fit much like the wooden former offered up to the dish edge.
There are 2 curved plates on this strip which are yet to be cut off.
It seemed prudent to make both plates in one go before seperating them.....but the strip isn't long enough for the 3rd edge bracket and so I will have to repeat the process for bracket 3.
The middle hole isn't relevant beyond forming.
hope that makes sense CH
I have left the brackets long enough for extra holes to be drilled in situe if needed for extra rigidity.

These photos should make it clearer.
rgds
Well, I can only see five holes in the second image, so job done.

What about the feed supports on the other three joints within the external pattern ?

 
Last edited:
Well, I can only see five holes in the second image, so job done.

What about the feed supports on the other three joints within the external pattern ?

They were never removed for the dish extension panels CH ...the actual feed support/trripod legs fit into what are plates and leg mounts combined.
They would have been a pita to construct..and like all the original parts would have been cast not formed
See photo.
 

Attachments

  • P1010028.webp
    P1010028.webp
    446.5 KB · Views: 13
Understood, though my concern is these are where the parabola is not being retained.

Can you undo the bolts on them, even a little ?
 
Understood, though my concern is these are where the parabola is not being retained.

Can you undo the bolts on them, even a little ?
I can slacken them off Stephen but I dont think the legs of the tripod which atm is copper tube are strong enough to deform the parabola.
The tripod legs would bow before anything moved on the dishes overall shape.
The cast tripod leg brackets are bloody tough beasts.
all that said there is a tiny bit of play available...but do remember there are L shaped cast brackets on the underside of the dish similar to the earlier photo..
 
I'm now repeating the annealing process again...this time marking both surfaces with sharpie and making sure both sets of markings vanish totally.
This ally strip is incredibly resistant to changing shape permanently.
having let it air cool all afternoon it still sprung back to near flat when removed from the wooden former.
There is evidence of curving but not sufficiently..
This is bloody tough stuff.
I might even apply the hammer a little
 
Back
Top